By Create Love Share
What is Diamond Painting? Everything You Need to Know (2021 Update)
A comprehensive introduction and guide on how to paint with diamonds
IFyou've never tried diamond painting before, maybe it sounds a bit funny at first. Are they real diamonds? How do you "paint" with something that's solid and looks like a small crystal? In this article, we answer all your questions and take you through the entire process from A to Z. Plus we'll give you some great tips on how to purchase your very first diamond painting or diamond art project in Australia.
Most people have heard of cross-stitch and paint by numbers. You can think of painting by diamonds as a combination of the two! You'll follow coloured guides on a fabric canvas to completely fill in a picture, but instead of using thread or paint, you're using little resin beads (officially called "drills") that are cut into facets and corners - just like the diamonds you see in real life. And similar to actual diamonds, they sparkle and shimmer too!
So what's in a diamond painting art kit?

When you purchase a new diamond painting kit, you'll receive the entire kit and caboodle with everything you need to get started. These components are:
1. Fabric canvas. Your selected design will be printed on the surface in either square or round symbols. Every colour is a different symbol. The surface is pre-applied with a strong glue to hold the diamond drills you'll be placing on it. There's always a clear plastic cover to protect the sticky surface from things sticking to it.
2. Diamond drills. There are up to tens of thousands of these little guys. Don't be intimidated! Diamond painting is so easy to do, but it is a craft that requires patience. The drills have one pointed and cut side and a flat bottom. The bottoms will either be square or round in shape. Each colour will usually be separated into its own little plastic baggy that is clearly marked with a number. You will usually see between 20 to 60 colours per design, depending on the size.
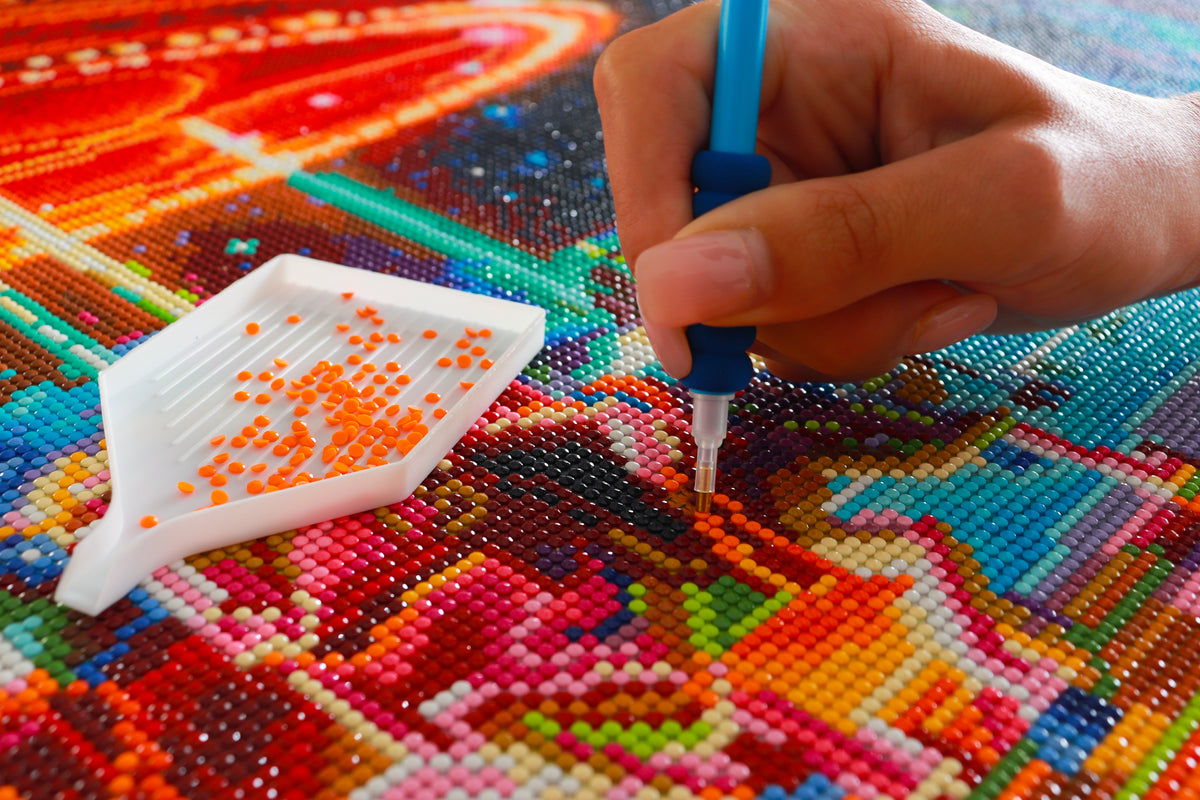
3. Applicator pen. This is what you'll use to pick up the drills and place them on to the canvas in the correct spot, according to the colour guide. The tip is hollow and will hold the sticky wax that helps you pick up the drill pieces. You can put accessories on the opposite side (think of a pencil eraser but with a different purpose).
4. Wax caddy. Create Love Share kits will come with a white wax piece that comes with a small plastic container, and can be closed and opened. Most kits will simply have the wax piece on its own. The applicator pen is pushed inside the wax and it stays inside the hollow tip, ready to pick up those diamond pieces.
5. Drill tray. You pour the drills out on to this tray to make it easier to pick up the individual pieces. The tray has ridges so that the drills will "flip" the right way up when you give it a gentle sideways shake. You pick up the pointy side and place the flat side on the canvas.
6. Bulk applicators. When you have a bit of experience using the hollow tip side of the applicator, you can put these accessories on the opposite end to pick up many drills at once! This will help you speed through larger sections containing the same colour. The bulk applicators come in different sizes.
7. Guide sheet. This is simply an A4 printout with all the colours and which symbols they correspond to on the canvas. Don't worry if you lose it - the colour legend is always pre-printed on the sides of the canvas itself.
The Process - How Does it Work?
Now that you know what goes into every kit, maybe you're starting to get the picture of how it all works together! Here we describe the whole thing in detail, including some tips for when you're just starting out.

Step 1. When you first open the kit, unfurl the canvas and run your hand over the plastic cover to help it flatten. We recommend placing some heavy books on it for a few hours to let the canvas rest and flatten.

Step 2. Choose one of the corners to start working. Look at the symbols of the colours and find the corresponding bag in the packet containing all your diamond drills.

Step 3. Open the drill bag and pour some out onto the tray. If your bags aren't the resealable type, make sure to only cut a small corner so you can put them back later. You can use your own craft ziploc bags or jewellery boxes. You can also purchase diamond storage containers right here.

Step 4. Gently shake the tray from side to side. The drills will flip over the ridges and the pointy side will face towards you. Not all the drills will flip and that's okay - you can shake them more as you work.
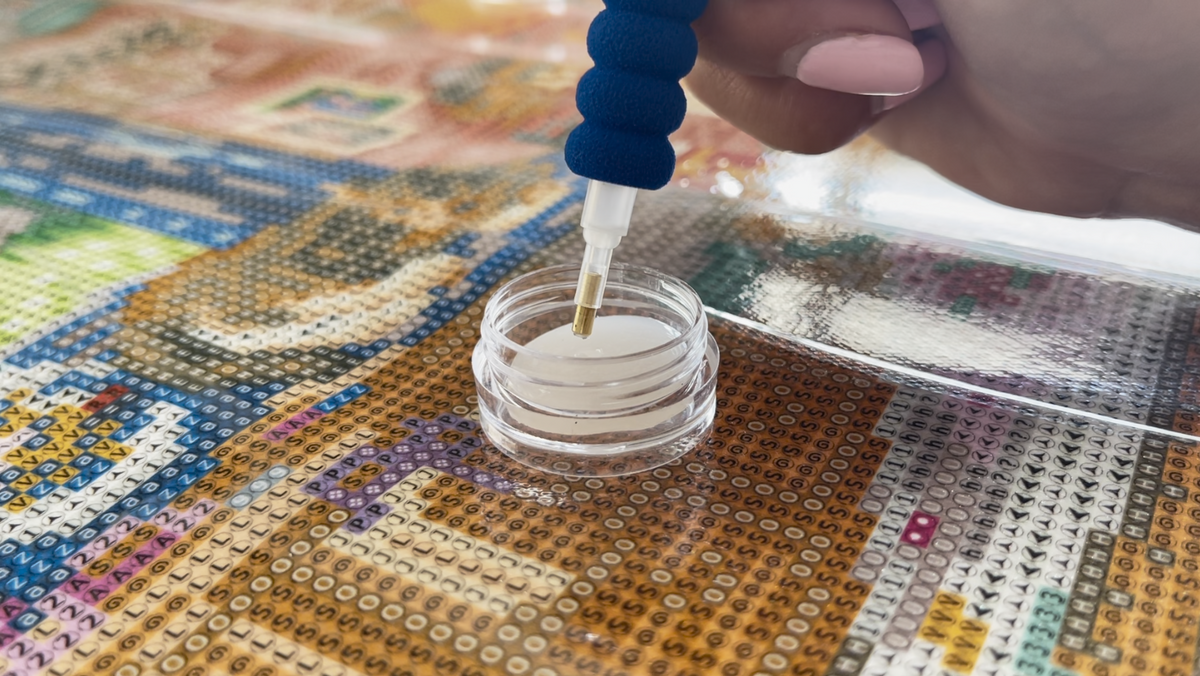
Step 5. Using the applicator pen, push it all the way through the wax piece. The hollow tip will fill up with wax. You don't have to do this every time you need to pick up a drill (only once in a while).

Step 6. Now you can use the pen to pick up one of the drills. They easily stick to the wax on the tip of the pen, so there's no need to apply a lot of pressure.

Step 7. Finally, place the drill on to its correct square or circle based on the colour guide. Continue in this way until you want to switch colours, then simply pour all the drills from the tray back into its bag or into a container.

Step 8. Simply repeat the process with all the colours until your masterpiece is finished. That's it - then take a step and marvel at your creation. You're about to get a lot of compliments!
See it all in action - here's a video of how it's done!
What next? Frame it up or make it a very special gift!
You've now completed your first diamond painting. Congratulations!
It would have been a long journey (especially for first-timers!) but we're very sure you'll agree - it would have all been worth it. Now all that's left to do is either find a suitable frame and hang up your art pride of place in your home.
Of course, if you're the giving type, send it the way of someone special as an awesome, handmade gift. We promise it'll be so beautiful, there won't be a dry eye in the room when you reveal it to the lucky recipient!


The only thing better than diamond painting itself is showing it off!
Diamond painting is truly an amazing hobby that you have to experience yourself to see how fun and addictive it is. The reason it's become so popular is because it does wonders for melting away your stress and anxiety. Simply create a space for yourself to work, put on some music and forget the world for a while. Trust us, when you get started it's hard to stop - your friends and loved ones will soon be wondering how your home has suddenly filled up with so much gorgeous, dazzling art!
Frequently Asked Questions
What size do I choose?
This is entirely up to preference and how much patience you think you'll have! When just starting out, we recommend choosing a small to medium size piece between 30cm to 45cm on the short side. The larger the size, the more detailed the final picture. Your first project may take a while to complete but as you get better, you'll be finishing off the larger sizes in no time at all!
Square or round diamonds?
Again this is up to preference. Square diamonds are a bit more challenging since the placement is less forgiving and requires a more steady hand. Round diamonds have gaps in between the edges so you can go a bit faster without worrying too much. If you like a satisfying challenge, choose square - we recommend beginners choose round. The visual difference between the two is actually very subtle from far away, but both options will sparkle and shine all the same.
How long does it take to finish?
As we've mentioned previously, diamond painting is a game of patience and a labour of love. At least that means you get great value for your money🙂 When first starting out, a small 30x30cm picture can take up to 15 hours, with larger sizes requiring 50 hours or more. Simply relax and enjoy the activity and you'll be surprised where all the time went as you're staring down at your sparkly work of art!
Customer Showcase
Want to see completed artworks from real customers?
Simply click on the link below to be taken to our page full of happy customers who were gracious enough to share their completed masterpieces. Just keep in mind, you've got to see it in real life to believe how much they sparkle!
See customer showcase.
Excited yet? Find a design you like and get started today!
Browse over 50 officially licensed designs right here at Create Love Share.
If you think it's time to dive right in, simply choose a gorgeous design that suits your taste and make your purchase. There's no time like the present!
Simply click the button below to be taken to our full catalogue. Happy diamond painting!
Related Posts

How to Create Stunning Art with Diamond Painting Kits in Australia

Everything You Need to Know About Diamond Painting Kits in Australia